.png)
Out of the box, a Raspberry Pi is configured for general use, but there are several settings you can tweak to make it more secure, efficient, and tailored to your projects. Whether you're running a headless server or building a desktop-like experience, changing a few defaults can make a big difference. These adjustments don't take long but can significantly improve how your Pi performs and interacts with your network or hardware.
5 Change the default username and password
Secure your Pi from unauthorized local or remote access
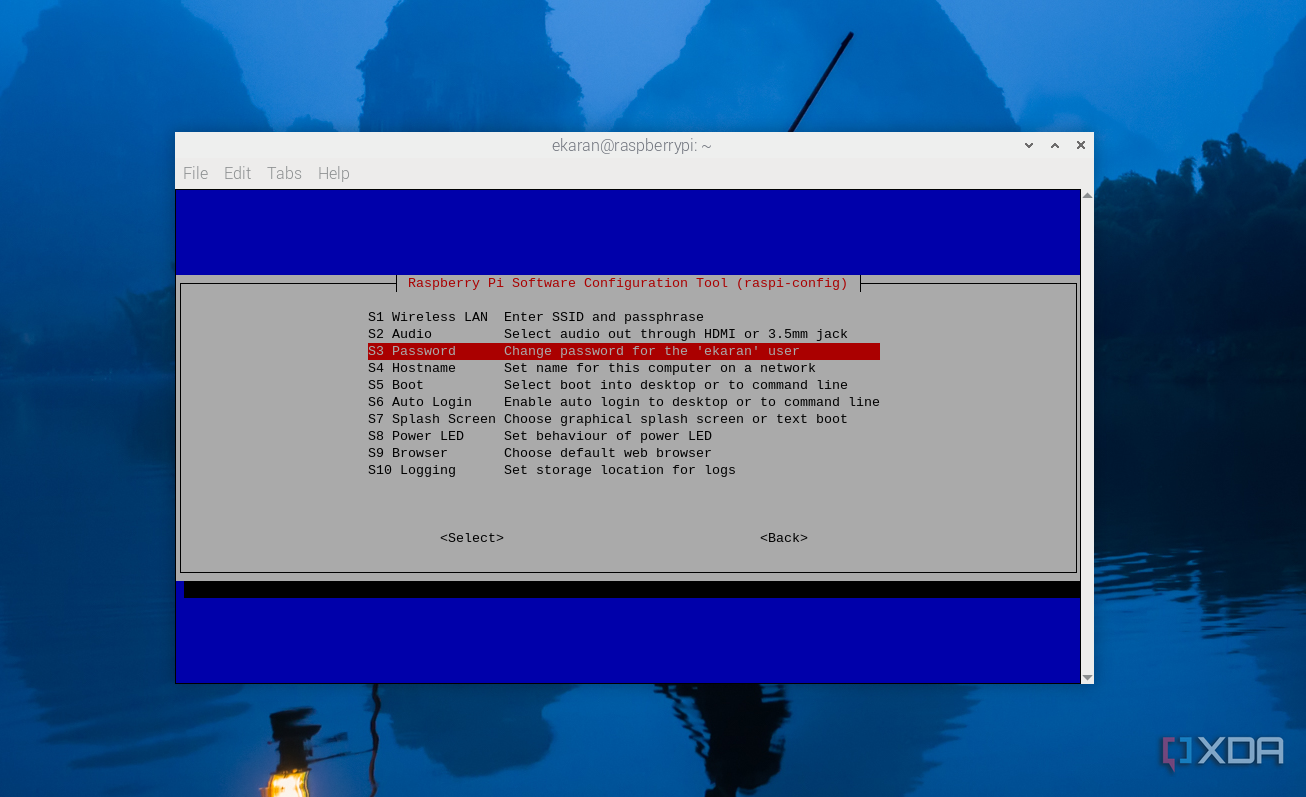
One of the most important things you should do after your Raspberry Pi boots for the first time is change the default login. The standard username and password—usually "pi" and "raspberry"—are public knowledge, making them a security risk. If your Pi is ever connected to a network, even briefly, leaving these defaults in place leaves the door wide open. It only takes one automated scan to expose your device to a potential compromise.
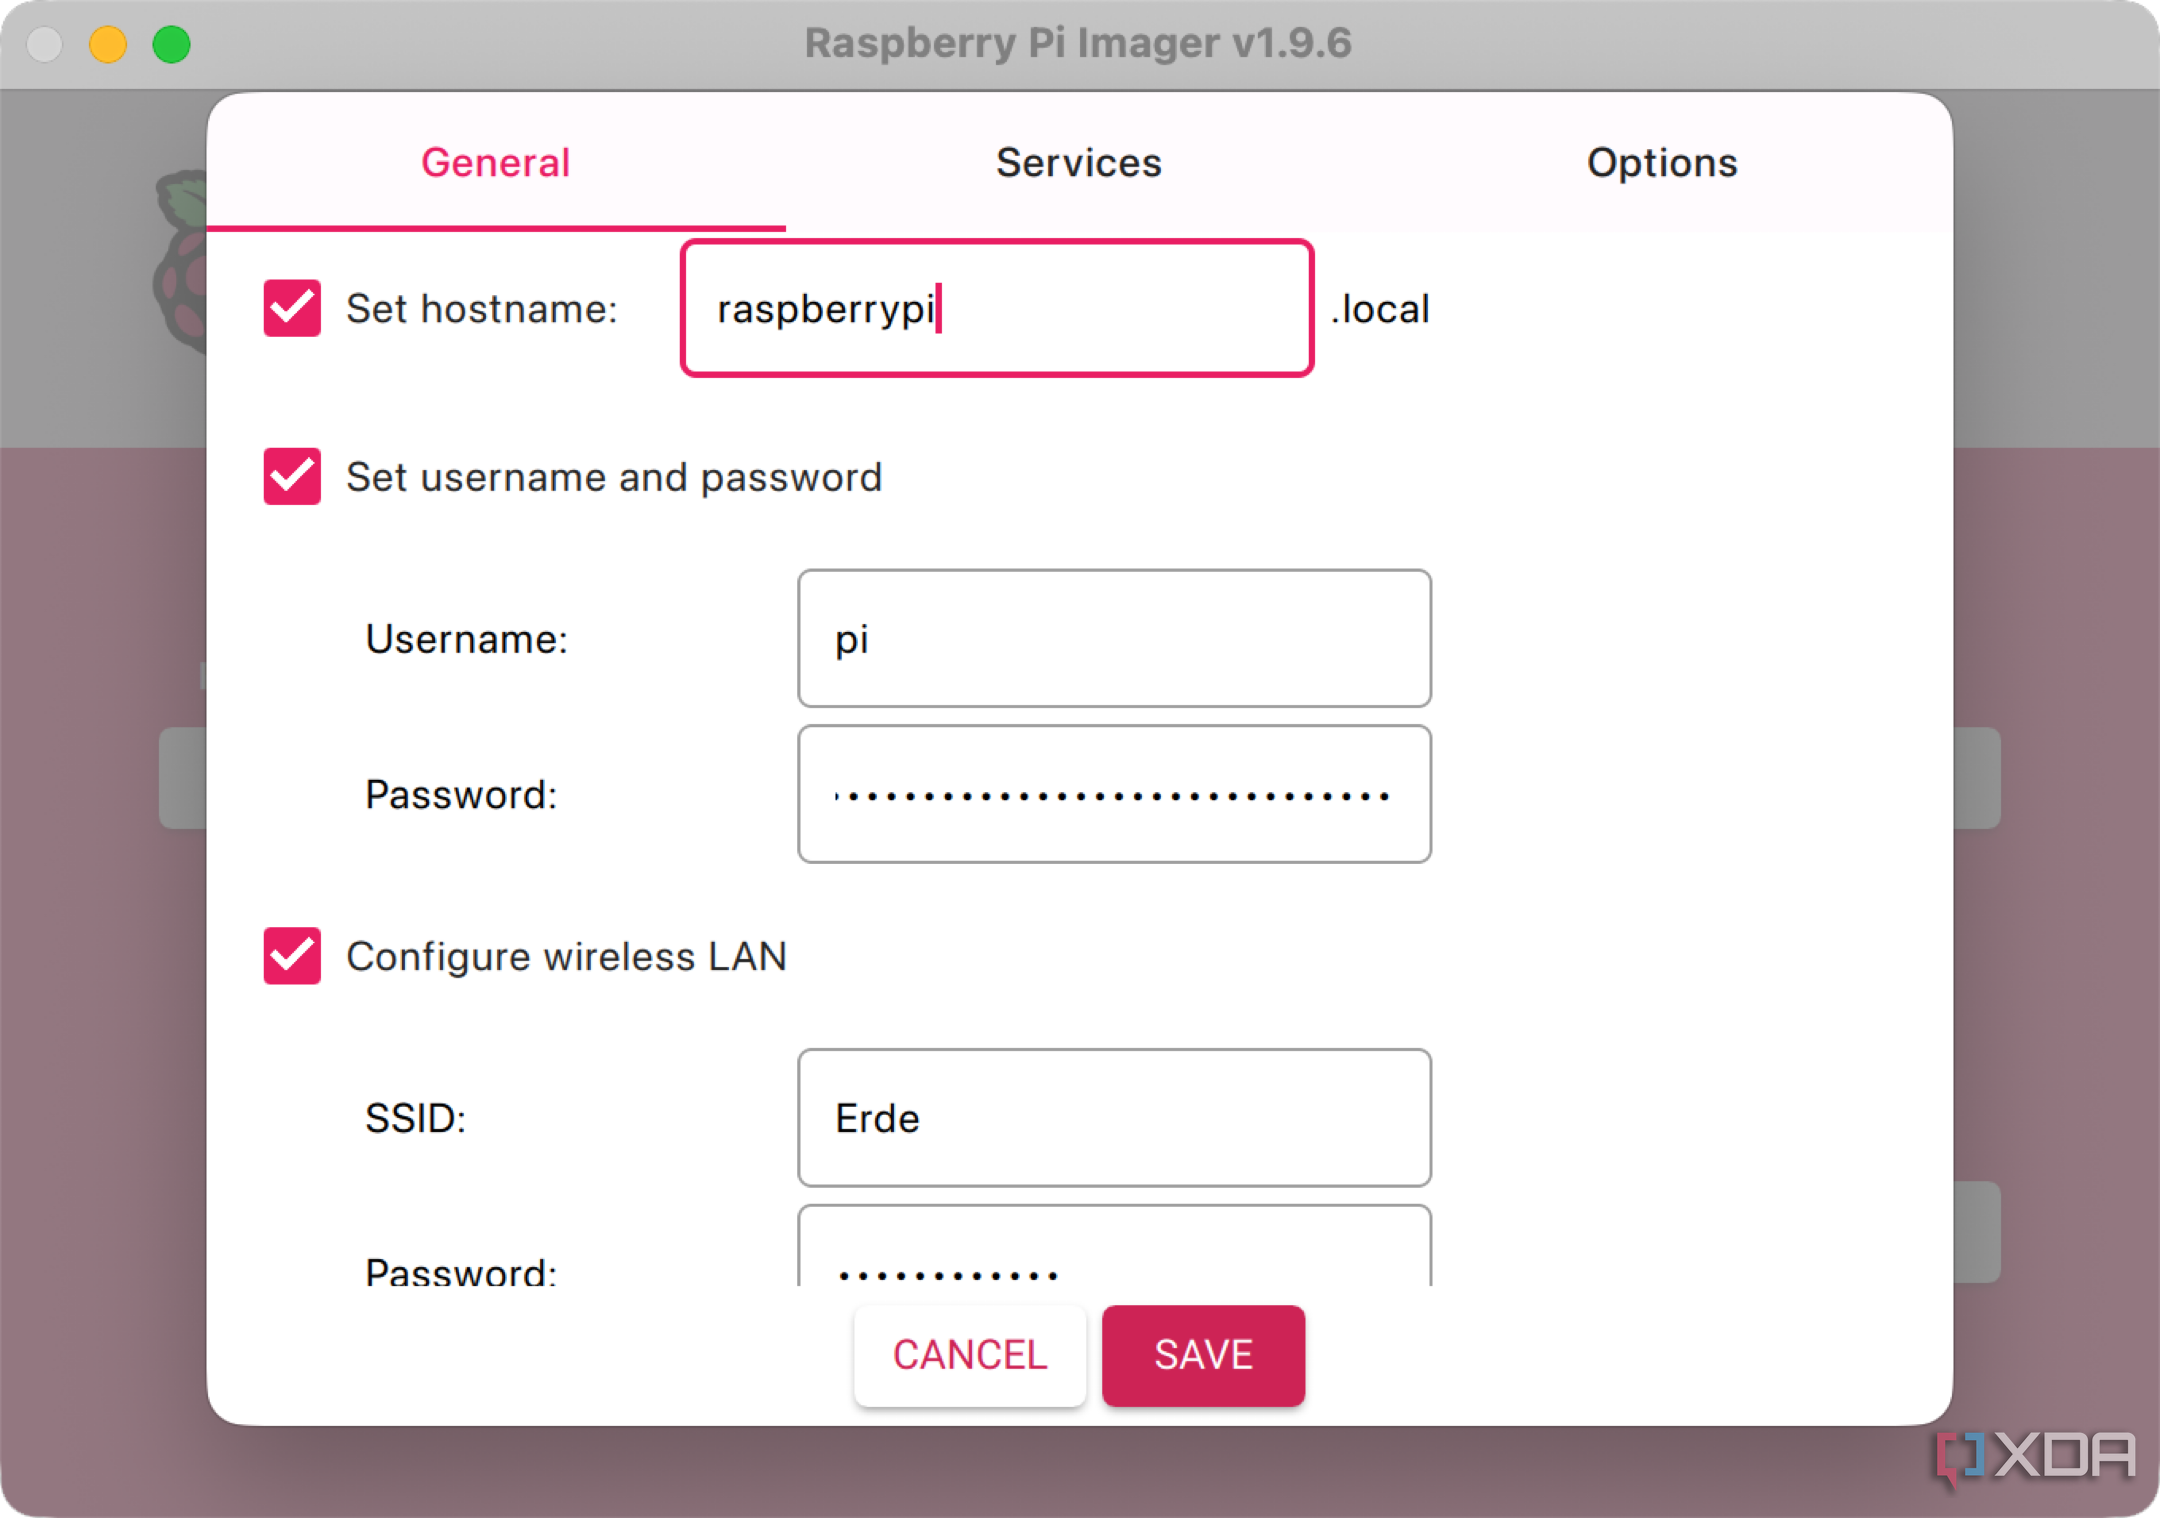
Changing the password is straightforward. If you're using a terminal, run the passwd command while logged in as the default user. For those using the Desktop version of Raspberry Pi OS, the built-in configuration tool under Preferences lets you change it with a few clicks. Newer versions of Raspberry Pi Imager also let you set a username and password before writing the image, which helps prevent this problem from the start.
Changing the username is a bit more involved, but still possible. You'll need to create a new user with sudo privileges, log in under that account, and then delete or disable the default "pi" user. This is worth doing for any system that will be reachable over your local network or the internet. Even if you're using the Pi for personal experiments, good security practices start here.
Many of these tasks can be completed when you flash the OS to your micro SD card. If you use the Raspberry Pi Imager, it will prompt you to apply OS customizations before flashing the image.
4 Set your locale, timezone, and keyboard
Avoid frustrating bugs by correcting region settings
Your Raspberry Pi might come preloaded with settings based on the UK region, especially if you're using Raspberry Pi OS. This affects the keyboard layout, date and time formatting, and even the default language used in menus or messages. If you're not located in the UK, these defaults can quickly become frustrating. You might press the @ key and get a quotation mark instead, or find that log timestamps don’t match your local time.
To fix these issues, use the raspi-config tool in the terminal. Go to “Localization Options,” where you’ll see prompts to set your locale, timezone, keyboard layout, and Wi-Fi country. These are easy to configure and only take a minute or two each. Once done, the settings take effect system-wide, improving everything from software installs to cron jobs.
If you're setting up your Pi without a monitor, you can also change these settings by editing system files directly. For example, /etc/timezone can be edited to set your correct region, and /etc/default/keyboard controls your layout. But unless you have a particular need, using raspi-config is much simpler. These changes help make the Raspberry Pi feel like it belongs in your setup, rather than fighting you with mismatched assumptions.
3 Enable SSH and configure key access
Control your Pi remotely with secure methods

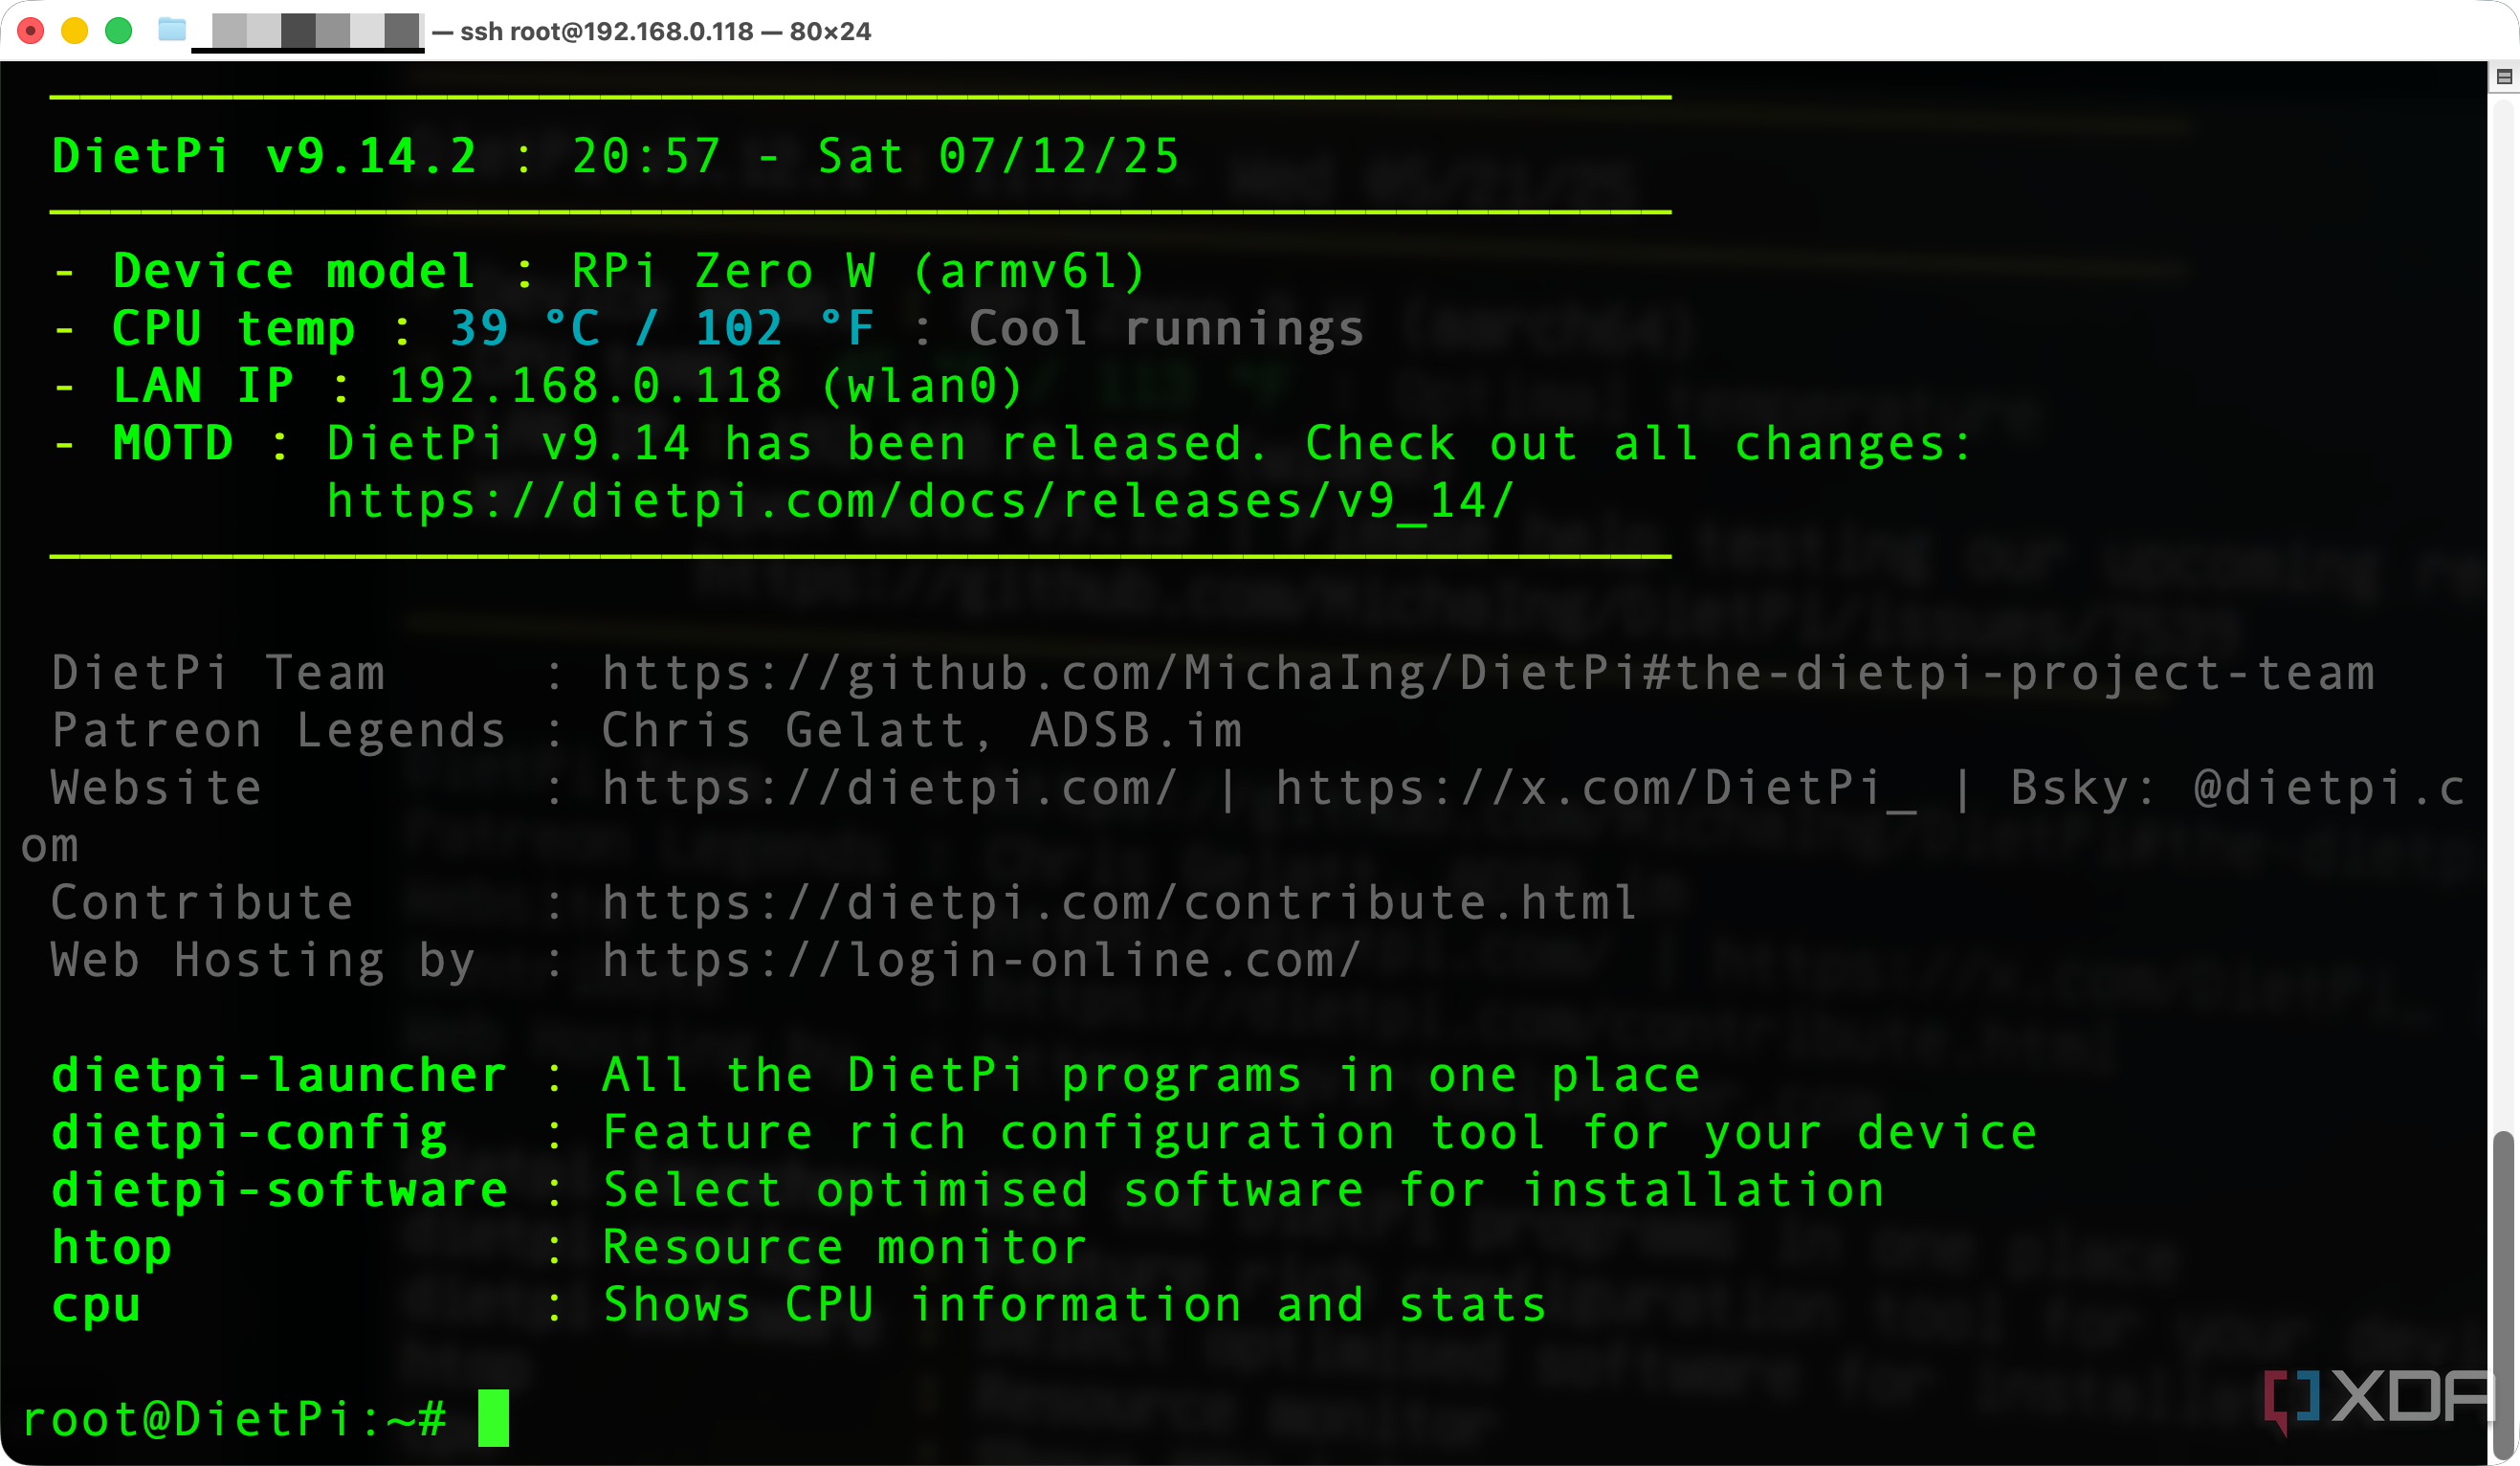
SSH access is one of the most valuable features for headless Raspberry Pi setups, but it’s disabled by default on Raspberry Pi OS. If you're using your Pi without a monitor, keyboard, or mouse, enabling SSH is essential. You can do this in the Desktop interface or with sudo raspi-config under “Interfacing Options.” If you’re preparing your SD card ahead of time, you can enable SSH by adding a blank file named ssh to the boot partition before inserting it into the Pi.
Once SSH is up and running, consider setting up key-based authentication. SSH keys are more secure than passwords and make logging in faster. Use a tool like ssh-keygen to generate a public/private key pair on your main computer, and then use ssh-copy-id to transfer the public key to your Raspberry Pi. Next, disable password-based login in the SSH configuration to secure the system further.
For extra protection, especially if your Pi is exposed to the internet, consider changing the default SSH port and installing Fail2Ban or UFW. These tools help block repeated login attempts and limit which ports are open. Even a small device like the Raspberry Pi deserves strong security practices. Once SSH is appropriately configured, you’ll be able to manage your Pi from anywhere on your network with peace of mind.
2 Adjust GPU memory split
Free up RAM or boost graphics depending on needs
The Raspberry Pi shares its system RAM with the GPU, and by default, it allocates more than necessary for many projects. If you're running your Pi headless or using it as a server, that GPU memory isn't doing you any good. In fact, it's wasting RAM that could be used for caching, services, or background processes. Adjusting the GPU memory split is a simple fix that gives you better control over system resources.
You can make this change through the Raspberry Pi Configuration tool if you're using the desktop environment. For headless setups, edit the config.txt file located in the boot partition of your SD card. Look for a line starting with gpu_mem and set it to a lower value, like 16 or 32, for headless use. For media centers or desktops, values between 128 and 256 may be more appropriate depending on your needs.
Keep in mind that allocating too little GPU memory when running a graphical environment can result in display glitches or sluggish performance. On the flip side, reserving too much memory for the GPU can impact your services and background apps. Take a few moments to assess your use case and choose a value that matches. It's a quick adjustment that helps your Raspberry Pi run more efficiently.
1 Expand the filesystem after flashing
Make full use of your SD card's capacity
After flashing a Raspberry Pi OS image onto your SD card, you may notice that only a small portion of the card’s storage appears to be available. This happens because most pre-built images create a partition that doesn’t take advantage of the card’s full capacity. If you don’t expand the filesystem manually, you’ll eventually hit limits when installing packages, updating the system, or saving files.
To expand the filesystem, run sudo raspi-config and navigate to “Advanced Options,” then select “Expand Filesystem.” After confirming the action, reboot your Pi. The root partition will then stretch to fill the entire SD card, and you’ll be able to use the whole storage space. This is a one-time step that should be done immediately after the first boot to avoid potential problems later on.
You can verify the change by running df -h and checking the size of the root (/) partition. This is especially important for large-capacity cards where you might otherwise be limited to just a few gigabytes. Expanding the filesystem helps prevent surprise storage errors, particularly in long-running or data-heavy projects. It’s one of the simplest yet most important settings to check early on.
These tweaks give your Pi a strong foundation
A Raspberry Pi is a flexible and capable little device, but it works even better with a few thoughtful adjustments. Changing default credentials, tuning system settings, and securing remote access make it more reliable and safer to use.
These adjustments don't take long but can significantly improve how your Pi performs
These changes don’t take long but go a long way toward improving the overall experience. Whether you're using it for automation, media, or development, starting with the correct settings sets you up for success.
CPU Arm Cortex-A76 (quad-core, 2.4GHz)
Memory Up to 8GB LPDDR4X SDRAM
Operating System Raspberry Pi OS (official)
Ports 2× USB 3.0, 2× USB 2.0, Ethernet, 2x micro HDMI, 2× 4-lane MIPI transceivers, PCIe Gen 2.0 interface, USB-C, 40-pin GPIO header


 English (US) ·